Vuexを用いたVue.jsアプリケーションのシンプルな状態管理とデータフロー

Vue.js では、シンプルに状態管理を行えるように Vuex という状態管理パターンライブラリが提供されています。
今回は Vuex を使った状態管理の一連の流れを実装していきながら見ていきます。
開発環境
今回の開発環境は以下の通りです。
- Vue.js 2.x
- Vue CLI 3.x
- Node.js 12.x
- npm 6.5
今回は、Vue CLI でプロジェクトを作成 し実装を進めていきます。
Vuex
Vuex は、Vue.js アプリケーションの状態管理を行う為のライブラリです。
Vue.js で構築するアプリケーションは、その規模が大きくなるにつれ状態管理が複雑になっていきます。 この「状態を管理する」とは、何らかの操作によって値などが変更され再描画されていくなどの、一連のデータフローを指しますが、 このデータフローが煩雑だと、あちこちの方向から無造作に状態変更が行われたりしだすので、最終的にアプリケーション動作 の裏で起きている処理を掌握しきれなくなったりします。
こういった状態管理をできるだけシンプルに、常にデータフローを一方向にするように作られたパターンが Vuex です。
詳しい概念や説明は公式リファレンスから確認できます。
https://vuex.vuejs.org/ja/
前段準備
今回はカウンターアプリを例に Vuex での実装を行っていきます。
まずは、元となるコンポーネントを2つ作成します。 App.vue より、Counter コンポーネントを読み込ませる形にして、そこから Vuex を用いた実装を行っていきます。
- components/Counter.vue
-
<template>
  <div>
    <p>{{ count }}</p>
    <button>-</button>
    <button>+</button>
  </div>
</template>

<script>
    export default {
        name: "Counter",
        data () {
            return {
                count: 0
            }
        }
    }
</script>

<style lang="scss" scoped>

</style>
App.vue
<template>
  <div id="app">
    <counter></counter>
  </div>
</template>

<script>
import Counter from './components/Counter.vue'

export default {
  name: 'app',
  components: {
      Counter
  }
}
</script>

<style lang="scss">

</style>
これらを以下の npm コマンドを叩いてブラウザで確認します。
npm run serve
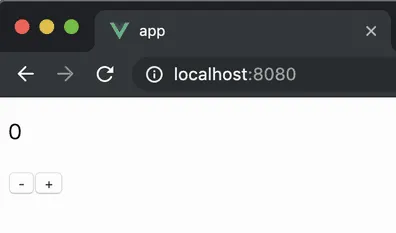
カウンターの数値と増減のボタンが表示されています。 この時点ではまだ何も定義していないので、もちろんボタンを押下しても何も起こりません。
store
まずは状態管理の核となる store を作成します。
- store.js
-
import Vue from 'vue'
import Vuex from 'vuex'

Vue.use(Vuex)

export default new Vuex.Store({
  state: {

  },
  mutations: {

  },
  actions: {

  }
})
Vue CLI でプロジェクトを作成(Vuex 有効)した場合は既に作成されています。 これに状態管理のコードを記述していきます。
state
state を定義します。 state とは「状態」であり、今回のカウンターアプリでは「カウントの値」がそれに該当します。
従って、これまで Counter コンポーネントで保持していた count を state に定義し直し、component に表示させます。
- store.js
-
import Vue from 'vue'
import Vuex from 'vuex'

Vue.use(Vuex)

export default new Vuex.Store({
  strict: process.env.NODE_ENV !== 'production',
  state: {
    count: 0,
  },
  mutations: {

  },
  actions: {

  }
})
state プロパティに count を定義しています。初期値は0です。
- components/Counter.vue
-
<template>
  <div>
    <p>{{ count }}</p>
    <button>-</button>
    <button>+</button>
  </div>
</template>

<script>
    import store from '../store'

    export default {
        name: "Counter",
        computed: {
            count () {
                return store.state.count
            }
        }
    }
</script>

<style lang="scss" scoped>

</style>
これまであった data オプションを除去し、store から count を返すようにしています。
これでカウンター値が Counter コンポーネントから store へ移りました。
mapState ヘルパー
これから store で色々と管理をしていきますが、管理するものの数が増えると、コンポーネント側の記述が冗長になってきます。 これ毎回「store.state.count 」って書くの?長くない?みたいなやつです。
コンポーネント側もできるだけシンプルに記述できるように、ヘルパーが用意されています。 state に関する mapState ヘルパーを用いて記述をシンプルな形へ変更します。
- components/Counter.vue
-
<template>
  <div>
    <p>{{ count }}</p>
    <button>-</button>
    <button>+</button>
  </div>
</template>

<script>
    // import store from '../store' <- 不要なのでコメントアウト
    import { mapState } from 'vuex'

    export default {
        name: "Counter",
        computed: {
            /*
            count () {
                return store.state.count
            }
            */
            // ↓
            // 変更
            ...mapState([
                "count" // => `this.count` が `store.state.count` にマッピングされる
            ]),
        }
    }
</script>

<style lang="scss" scoped>

</style>
mapState をインポートしています。これによって store のインポートは不要になります。
mapState を定義した事で、store.state.count を this.count として使用出来るようになります。
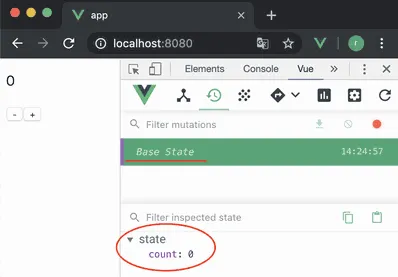
ここまでで一度ブラウザから確認してみると、見た目は全く変わりませんが、devtools で確認すると、count の管理がコンポーネントから store へ移っている事が確認できます。
mutations
mutations を定義します。 mutations とは「変更」であり、今回の例では、カウンター値を変更する処理がそれに該当します。
- store.js
-
import Vue from 'vue'
import Vuex from 'vuex'

Vue.use(Vuex)

export default new Vuex.Store({
  strict: process.env.NODE_ENV !== 'production',
  state: {
    count: 0,
  },
  mutations: {
    // 追加
    increment (state) {
      state.count++
    },
    decrement (state) {
      state.count--
    }
  },
  actions: {

  }
})
mutations にそれぞれ increment と decrement を定義しています。 カウンター値を1つ増やす・減らすの処理です。
mutations には state を変更する為の処理を定義しますが、約束として「同期処理のみを定義する」というルールがあります。 非同期処理は書かないでね。という事です。
コンポーネント側も実装します。
- components/Counter.vue
-
<template>
  <div>
    <p>{{ count }}</p>
    <button @click="sub">-</button>
    <button @click="add">+</button>
  </div>
</template>

<script>
    import { mapState } from 'vuex'

    export default {
        name: "Counter",
        computed: {
            ...mapState([
                "count"
            ]),
        },
        // 追加
        methods: {
            add () {
                this.$store.commit('increment')
            },
            sub () {
                this.$store.commit('decrement')
            }
        }
    }
</script>

<style lang="scss" scoped>

</style>
methods にそれぞれ add と sub を定義しています。
コンポーネント側から mutation を実行するには、下記のように commit を実行します。
this.$store.commit('メソッド名')
mapMutations ヘルパー
state と同じく、ミューテーションもヘルパーを用いて記述をシンプルにします。
- components/Counter.vue
-
<template>
  <div>
    <p>{{ count }}</p>
    <button @click="sub">-</button>
    <button @click="add">+</button>
  </div>
</template>

<script>
    import { mapState } from 'vuex'
    import { mapMutations } from 'vuex' // 追加

    export default {
        name: "Counter",
        computed: {
            ...mapState([
                "count"
            ]),
        },
        methods: {
            // 追加
            ...mapMutations([
                'increment', // => `this.increment()` が `this.$store.commit('increment')` にマッピングされる
                'decrement'  // => `this.decrement()` が `this.$store.commit('decrement')` にマッピングされる
            ]),
            add () {
                this.increment()
            },
            sub () {
                this.decrement()
            }
        }
    }
</script>

<style lang="scss" scoped>

</style>
mapMutations をインポートしています。 mapMutations を定義した事で、それぞれのメソッドの記述がシンプルになりました。
actions
actions を定義します。 actions とは「アクション」であり、外部 API との連携や非同期処理がそれに該当します。 今回の例では、非同期で値を追加する処理で実装していきます。
- store.js
-
import Vue from 'vue'
import Vuex from 'vuex'

Vue.use(Vuex)

export default new Vuex.Store({
  strict: process.env.NODE_ENV !== 'production',
  state: {
    count: 0,
  },
  mutations: {
    increment (state) {
      state.count++
    },
    decrement (state) {
      state.count--
    }
  },
  actions: {
    // 追加
    incrementAsync ({ commit }) {
      return new Promise((resolve, reject) => {
        setTimeout(() => {
          commit('increment')
          resolve()
        }, 1000)
      })
    },
    // 追加
    decrementAsync ({ commit }) {
      return new Promise((resolve, reject) => {
        setTimeout(() => {
          commit('decrement')
          resolve()
        }, 1000)
      })
    },
  }
})
1秒後にそれぞれ1ずつ増減する処理を actions に定義しています。
コンポーネント側も実装します。
- components/Counter.vue
-
methods: {
    ...mapMutations([
        'increment',
        'decrement'
    ]),
    add () {
        this.increment()

        this.$store.dispatch('incrementAsync') // 追加
    },
    sub () {
        this.decrement()

        this.$store.dispatch('decrementAsync') // 追加
    }
}
コンポーネント側から action を実行するには、以下のように dispatch を実行します。
this.$store.dispatch('メソッド名')
ちなみにこれは mutation も同じですが、引数を渡す事も可能です。その場合は以下の様に定義します。
- components/Counter.vue
-
methods: {
    ...mapMutations([
        'increment',
        'decrement'
    ]),
    add () {
        this.increment()

        this.$store.dispatch('addAsync', {
            amount: 1000
        })
    },
    sub () {
        this.decrement()

        this.$store.dispatch('subAsync', {
            amount: 1000
        })
    }
}
第一引数にメソッド名、第二引数に渡したい値を指定します。
処理を変更したので、action の方も変更し指定数を追加できるようにします。
- store.js
-
import Vue from 'vue'
import Vuex from 'vuex'

Vue.use(Vuex)

export default new Vuex.Store({
  strict: process.env.NODE_ENV !== 'production',
  state: {
    count: 0,
  },
  mutations: {
    increment (state) {
      state.count++
    },
    decrement (state) {
      state.count--
    },
    // 追加
    add (state, amount) {
      state.count += amount
    },
    // 追加
    sub (state, amount) {
      state.count -= amount
    }
  },
  actions: {
    // 追加
    addAsync ({ commit }, payload) {
      return new Promise((resolve, reject) => {
        setTimeout(() => {
          commit('add', payload.amount)
          resolve()
        }, 1000)
      })
    },
    // 追加
    subAsync ({ commit }, payload) {
      return new Promise((resolve, reject) => {
        setTimeout(() => {
          commit('sub', payload.amount)
          resolve()
        }, 1000)
      })
    }
  }
})
ここでのポイントは、アクションでの処理でも、実際に state を変更する場合は mutation で行う点です。 このルールを守る事で単一のデータフローを遵守できます。
また、しれっと以下の記述があると思います
strict: process.env.NODE_ENV !== 'production',
これは厳格モードといって、ミューテーション以外でステートの変更があった場合にエラーを投げるように出来る設定です。開発環境でのみ動作するようにしています。
mapActions ヘルパー
アクションもヘルパーを用いて記述をシンプルにします。
- components/Counter.vue
-
<template>
  <div>
    <p>{{ count }}</p>
    <button @click="sub">-</button>
    <button @click="add">+</button>
  </div>
</template>

<script>
    import { mapState, mapMutations } from 'vuex'
    import { mapActions } from 'vuex' // 追加

    export default {
        name: "Counter",
        computed: {
            ...mapState([
                "count"
            ]),
        },
        methods: {
            ...mapMutations([
                'increment',
                'decrement'
            ]),
            // 追加
            ...mapActions([
                'addAsync', // => `this.addAsync()` が `this.$store.dispatch('addAsync')` にマッピングされる
                'subAsync' // => `this.subAsync()` が `this.$store.dispatch('subAsync')` にマッピングされる
            ]),
            add () {
                this.increment()

                // 変更
                this.addAsync({
                    amount: 1000
                })
            },
            sub () {
                this.decrement()

                // 変更
                this.subAsync({
                    amount: 1000
                })
            }
        }
    }
</script>

<style lang="scss" scoped>

</style>
mapActions をインポートしています。 mapActions を定義した事で、それぞれのメソッドの記述がシンプルになりました。
getters
getters を定義します。ここでは state の前処理を行う事が出来ます。 今回は、カウンター値の正負を判定する処理を実装して、それをコンポーネント側のクラス付与の判定に用います。
- store.js
-
import Vue from 'vue'
import Vuex from 'vuex'

Vue.use(Vuex)

export default new Vuex.Store({
  strict: process.env.NODE_ENV !== 'production',
  state: {
    count: 0,
  },
  // 追加
  getters: {
    isPositive: state => {
      return state.count > 0
    },
    isNegative: state => {
      return state.count < 0
    },
  },
  mutations: {
    increment (state) {
      state.count++
    },
    decrement (state) {
      state.count--
    },
    add (state, amount) {
      state.count += amount
    },
    sub (state, amount) {
      state.count -= amount
    }
  },
  actions: {
    addAsync ({ commit }, payload) {
      return new Promise((resolve, reject) => {
        setTimeout(() => {
          commit('add', payload.amount)
          resolve()
        }, 1000)
      })
    },
    subAsync ({ commit }, payload) {
      return new Promise((resolve, reject) => {
        setTimeout(() => {
          commit('sub', payload.amount)
          resolve()
        }, 1000)
      })
    }
  }
})
それぞれ、正の数か負の数かを判定して真偽値を返しています。
これをコンポーネント側で利用します。
- components/Counter.vue
-
<template>
  <div>
    <p :class="classesCount">{{ count }}</p><!-- classディレクティブ追加 -->
    <button @click="sub">-</button>
    <button @click="add">+</button>
  </div>
</template>

<script>
    import { mapState, mapMutations, mapActions } from 'vuex'

    export default {
        name: "Counter",
        computed: {
            ...mapState([
                "count"
            ]),
            // 追加
            classesCount () {
                return {
                    'blue': this.$store.getters.isPositive,
                    'red': this.$store.getters.isNegative
                }
            }
        },
        methods: {
            ...mapMutations([
                'increment',
                'decrement'
            ]),
            ...mapActions([
                'addAsync',
                'subAsync'
            ]),
            add () {
                this.increment()

                this.addAsync({
                    amount: 1000
                })
            },
            sub () {
                this.decrement()

                this.subAsync({
                    amount: 1000
                })
            }
        }
    }
</script>

<style lang="scss" scoped>
  // 追加
  .red {
    color: red;
  }
  .blue {
    color: blue;
  }
</style>
computed に classesCount を定義しています。 getters へのアクセスは、以下の書式で行えます。
this.$store.getters.methodName
これによってクラス名を付与して文字色を変更したいので、style も定義しています。
mapGetters ヘルパー
mapGetters ヘルパーを用いて、コンポーネント側の getters の記述をシンプルにします。
- components/Counter.vue
-
<template>
  <div>
    <p :class="classesCount">{{ count }}</p>
    <button @click="sub">-</button>
    <button @click="add">+</button>
  </div>
</template>

<script>
    import { mapState, mapMutations, mapActions } from 'vuex'
    import { mapGetters } from 'vuex' // 追加

    export default {
        name: "Counter",
        computed: {
            ...mapState([
                "count"
            ]),
            // 追加
            ...mapGetters([
                'isPositive', // => `this.isPositive` が `this.$store.getters.isPositive` にマッピングされる
                'isNegative', // => `this.isNegative` が `this.$store.getters.isNegative` にマッピングされる
            ]),
            classesCount () {
                return {
                    'blue': this.isPositive, // 変更
                    'red': this.isNegative // 変更
                }
            }
        },
        methods: {
            ...mapMutations([
                'increment',
                'decrement'
            ]),
            ...mapActions([
                'addAsync',
                'subAsync'
            ]),
            add () {
                this.increment()

                this.addAsync({
                    amount: 1000
                })
            },
            sub () {
                this.decrement()

                this.subAsync({
                    amount: 1000
                })
            }
        }
    }
</script>

<style lang="scss" scoped>
  .red {
    color: red;
  }
  .blue {
    color: blue;
  }
</style>
mapGetters を定義した事で、それぞれのメソッドの記述がシンプルになりました。
動作確認
ここまでで一連の実装が完了したので、ブラウザから確認してみます。
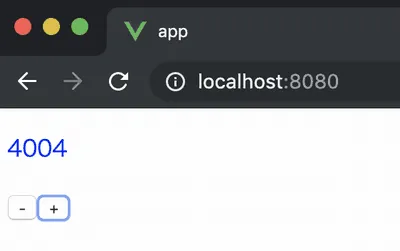
Vuex を用いて意図した通りの処理を実装できました。
modules
これまで行ってきた手順によって Vuex を用いた状態管理は実現できました。 ただ、アプリケーションが大きくなっていくとそれにつれて store の中身も大きくなっていく事は想像できると思います。
この時に、モジュールという単位に store を切り分ける事が出来ます。
ここまでのソースコードをモジュールに切り分けていきます。
module 作成
modules ディレクトリを作成し、そこへ counter.js を作成します。
- modules/counter.js
-
export const counter = {
  namespaced: true,
  state: {
    count: 0,
  },
  getters: {
    isPositive: state => {
      return state.count > 0
    },
    isNegative: state => {
      return state.count < 0
    },
  },
  mutations: {
    increment (state) {
      state.count++
    },
    decrement (state) {
      state.count--
    },
    add (state, amount) {
      state.count += amount
    },
    sub (state, amount) {
      state.count -= amount
    }
  },
  actions: {
    addAsync ({ commit }, payload) {
      return new Promise((resolve, reject) => {
        setTimeout(() => {
          commit('add', payload.amount)
          resolve()
        }, 1000)
      })
    },
    subAsync ({ commit }, payload) {
      return new Promise((resolve, reject) => {
        setTimeout(() => {
          commit('sub', payload.amount)
          resolve()
        }, 1000)
      })
    }
  }
}
store に定義したカウンター機能をそっくりこちらへ持ってきています。 それぞれ、state/getters/mutations/actions を定義できます。
store
モジュールへカウンターのストア定義を移動させたので、store はシンプルになります。
- store.js
-
import Vue from 'vue'
import Vuex from 'vuex'

import {counter} from './modules/counter';

Vue.use(Vuex)

export default new Vuex.Store({
    strict: process.env.NODE_ENV !== 'production',
    modules: {
        counter: counter
    }
})
counter.js をインポートし、モジュールとして登録する事で、store へ登録されます。
コンポーネント
最後にコンポーネント側も、参照先が変わるので記述を変更します。
- components/Counter.vue(map ヘルパーなし)
-
<template>
  <div>
    <p :class="classesCount">{{ count }}</p>
    <button @click="sub">-</button>
    <button @click="add">+</button>
  </div>
</template>

<script>
    import store from '../store'

    export default {
        name: "Counter",
        computed: {
            count () {
                return store.state.counter.count
            },
            classesCount () {
                return {
                    'blue': this.$store.getters['counter/isPositive'],
                    'red': this.$store.getters['counter/isNegative'],
                }
            }
        },
        methods: {
            add () {
                this.$store.commit('counter/increment')
                this.$store.dispatch('counter/addAsync', {
                    amount: 1000
                })
            },
            sub () {
                this.$store.commit('counter/decrement')
                this.$store.dispatch('counter/subAsync', {
                    amount: 1000
                })
            }

        }
    }
</script>

<style scoped>
  .red {
    color: red;
  }
  .blue {
    color: blue;
  }
</style>
- components/Counter.vue(map ヘルパーあり)
-
<template>
  <div>
    <p :class="classesCount">{{ count }}</p>
    <button @click="sub">-</button>
    <button @click="add">+</button>
  </div>
</template>

<script>
    import { mapState, mapGetters, mapMutations, mapActions } from 'vuex'

    export default {
        name: "Counter",
        computed: {
            ...mapState({
                count: state => state.counter.count,
            }),
            ...mapGetters({
                isPositive: 'counter/isPositive',
                isNegative: 'counter/isNegative'
            }),
            classesCount () {
                return {
                    'blue': this.isPositive,
                    'red': this.isNegative,
                }
            }
        },
        methods: {
            ...mapMutations({
                increment: 'counter/increment',
                decrement: 'counter/decrement'
            }),
            ...mapActions({
                addAsync: 'counter/addAsync',
                subAsync: 'counter/subAsync'
            }),
            add () {
                this.increment()
                this.addAsync({
                    amount: 1000
                })
            },
            sub () {
                this.decrement()
                this.subAsync({
                    amount: 1000
                })
            }

        }
    }
</script>

<style scoped>
  .red {
    color: red;
  }
  .blue {
    color: blue;
  }
</style>
詳しい説明は割愛しますが、こうしてモジュールとして store を切り出す事で、機能が増えても適切に管理していく事が可能になります。
まとめ
以上で作業は終了です。 長丁場だったのでダイジェストでの紹介でしたが、Vuex を導入する事でデータフローを一方向に整理でき、シンプルな状態管理を実現する事ができます。
ただし、リファレンスでも記載がある通り、すべてにこの Vuex が適用できるわけではありません。 規模や複雑さによってはオーバースペック的になり、コードがただ冗長になるなどするので、 その場合はシンプルな store パターン を用いるなど、アプリケーションの規模によって使い分けるのが良いでしょう。 ぜひ試してみてください、